Les Recettes de Ma Mère: One-pot Yunnanese Chicken

Saiarun lives a few houses away from the shop. She is a caregiver; she has been looking after a 97-year old woman for about 2 years. There is a light that shines about Saiarun - her smile reveals her spirited nature.

Most of us live in mighty fast times. There are days where some of us can even barely keep up with our schedules, much less pencil in any time to sustain ourselves through food. Saiarun (sigh-rune) grew up in a family whose food philosophy centred around quick, easy, and sustaining meals, and indeed, this thirty-minute dish she has chosen to prepare for us in this segment of Les Recettes de Ma Mère is still part of her regular repertoire of meals, and keeps very much to the way her mother prepared it.

"My mom was a business woman... so all her meals had to be prepared quickly. The thing is, I never learned to cook as a child. My mom cooked. My sister cooked."

When Saiarun got married, she realized she finally had to learn how to cook, so she would watch her sister and her mom prepare meals. "I learn really fast, but I forget really fast, too." Once she had acquired the foundations of her everyday culinary repertoire - which flavours go with which, etc. - the act of cooking and preparing meals also became part of her everyday. Something that seemed so preternaturally engrained in her mother and her sister in her early days suddenly feels so natural to her once she her adult life hit. As she was chopping up the aromatics for her dish, she said, laughingly, "I learned how to cook... because my husband loves to eat."

This dish is easy to prepare, needs very few ingredients, takes very little effort, even after all of the mise-en-place, and best of all, it takes only half an hour to prepare.

One-pot Yunnanese Chicken
Preparation time: 30 minutes | Serves 6-8

Ingredients
2 large onions
cloves from a bulb and a half of garlic
2 large thumb-sized pieces of ginger (with skin on)
2 tbsp. of soy (plus extra for seasoning, if required)
1 tbsp. oyster sauce
2 tsp. ground tellicherry peppers
1 whole chicken, cut into manageable pieces
2 tbsp. grapeseed oil

Mise-en-place

1) Mince the garlic and chop the onions. Set aside.

2) Slice the ginger into oval coins, then slice those coins into little matchsticks (julienne).

3) Take a butcher's cleaver, or your most sturdy knife, and cut the whole chicken into smaller pieces, a little larger than bite-sized. Saiarun says the trick to achieving this is to just give it all of the power you can; chicken bones are easy to cut through if you have a good, sharp knife. Of course, it is best to use a whole chicken for this, but if you feel a bit hesitant to tackle an entire chicken on your own, you can ask your butcher to do it for you, or, for convenience, purchase a few chicken pieces of your choice, enough to look like it came from one whole chicken.

IMG_7171.jpg

Directions

1) Heat 2 tbsp. of grapeseed oil or any sort of neutral cooking oil in a large pot or dutch oven. Sauté the garlic first until fragrant and aromatic, before adding in the ginger and the onions. Sauté until the onions have softened and the ginger has imparted its fragrance.

Saiarun says it is important to add the garlic in first because the point is to have the garlic act as a flavourful undertone. It is not supposed to taste overly 'garlicky', even after using an entire bulb and a half. The ginger and the liquid aromatics are supposed to be in the forefront. The garlic here really acts as the flavour-base, so to speak.

2) Add the chicken pieces into the pot and stir for a few minutes, making sure to coat the chicken sufficiently with the sautéed aromatics.

3) Add the oyster sauce, soy sauce, and pepper into the pot. Stir to incorporate.

4) Cover the pot and leave it for ten minutes.

5) After 10 minutes, stir from time to time, to make sure the chicken does not stick to the pot. The chicken juices and fat would have been released at this time, melding with the dry and liquid aromatics to create a 'stock'.

6) Simmer on high, uncovered, for another 10 minutes to let some of those juices evaporate and reduce.

7) Season with more soy if needed, and take off the heat. Serve over steamed rice and garnish with fresh cilantro and chopped scallions.

IMG_7204.jpg

Photographs: Issha Marie

Les Recettes de Ma Mère: Dorothy's Pierogies

We have been having some hot days lately, Vancouver. Pierogies, especially done Dorothy's way, are not your typical summer food.

But you can chase away the heaviness of pierogies with cold prosecco, and you know... it works. Pierogies and Prosecco in the summer - I will take it.

Kim Rossell

Kim Rossell

Kim Rossell lives in the apartment above the shop. If you have ever been to this year's Campesino Summer Pop-Up, marvelled at the space, and wished that you lived in this space... well... too bad... because Kim lives here. Janaki and the team turn her apartment into a pop-up shop whenever pop-up time arrives, and all of her books and personal dishes and furniture get stored away in the garage, or in her bedroom, for the duration of the pop-up run. She really and truly is a huge part of the Le Marché St George family.

Kim works as a body worker at the Fairmont Pacific Rim, but has plans to hold massage therapy sessions in her apartment above the shop. For fun, she tangos. I have never seen her dance - not yet - but every single time I run into her she is either running to tango practice or coming from a tango session.

This dish is really all about comfort, and the recipe is not in the pierogi itself... but in the sauce. It is rich and decadent and is the absolute perfect thing to eat when in the dead of winter in Edmonton.

Winter is a long way from now (we hope) so put this in your roster of easy meals to make when the cold days arrive. You can make pierogis from scratch, but for convenience's sake (and to perfectly demonstrate the sauce Dorothy (Kim's mother) adds on to those pillowy puffs of pure goodness), Kim opted to use frozen pierogies.

Dorothy's Pierogies
Preparation Time: 15-20 minutes. | Serves 3.

Ingredients
12 frozen pierogies
1 litre water
3 medium white onions, diced
5 strips of bacon
1 can of evaporated milk
olive oil + 1/4 cup of butter
salt and pepper to taste

1) Set your oven to broil and broil the bacon strips for five to seven minutes each side or until fat has mostly rendered and the bacon looks crispy. Drain on paper towels, and slice into bits. Set aside.

2) Set a litre of water to boil. Dice the onions.

3) Heat the olive oil and butter to medium heat. Once hot enough, fry the onions and bacon until onions are fragrant, slightly caramelized, and translucent and the bacon is crispy. Turn the heat down.

4) Boil the pierogies until it floats to the top. Drain, and fry on a separate skillet with olive oil and butter until the outside skins of the dumplings are slightly crispy and brown.

5) Add evaporated milk to the bacon and onion mixture and let the flavours mingle into the cream. Season with salt and pepper to taste.

6) Toss the crispened pierogies into the evaporated milk, bacon, and onion sauce and serve.

IMG_6769.jpg

We ate these pierogies on a table adorned with peonies and washed these dumplings down with prosecco. Pierogies, Prosecco, and Peonies. How's that for a delicious and visually-appealing alliteration?

Photographs: Issha Marie


Some notesLinen napkins and Janaki Larsen ceramics can be found in our shop location or here, in our online shop.
Kim Rossell is now taking massage therapy bookings in her apartment above the shop. Simply e-mail her at kim. rossell (at) gmail (dot) com.

Les Recettes de Ma Mère: Frittata di Patate

Rita lives just across the street from the shop. She supplies the cafe with fresh-baked ciabatta almost everyday (these days), and, when you're lucky enough to visit the cafe on a particular day, a basket-full of warm zeppole - Italian doughnuts tossed in cinnamon and sugar. She is a painter, an avid gardener, and - I noted - quite the feisty woman. Of course, upon first meeting her, I had remarked on this fact out loud, and she responded with, "What? You think I'm going to be this frail old woman? Of course I am feisty!"

Rita is an advocate for the classics - simple home-cooked recipes done well, and most importantly, done right.

When I was a teenager, I watched copious amounts of cooking shows on the Food Network, and watched chef after chef tackle a frittata by first, starting it on the stovetop, and then finishing the frittata inside a hot oven. I mean, I was aware of this stovetop method too, but not quite like the way Rita tackles this. The result is almost pie-like - with a thick interior from the chunky potatoes and onions, and a crispy-golden shell, from the thin layer of egg encapsulating the vegetables inside. She claims the oven-way is the lazy way, and you know, given the strength and conviction of her words and that sassy sideways look that she gave me when I even mentioned the word 'oven'... I believe it. I won't ever dare make a frittata using the oven again.

Janaki: I've only ever seen a frittata made in an oven...

Rita: Pfft. The oven is the lazy way! You NEVER, EVER make a frittata in the oven!!!

Frittata di Patate
Preparation Time: approximately 30 minutes | Serves 4

Ingredients
2 large russet potatoes, skin peeled, cut into chunks
2 medium white onions, cut into chunks
4 large eggs
1 cup (or so) of vegetable oil
salt and pepper to taste

Equipment
wok
spatula
slotted spoon
a bowl lined with paper towel
a shallow 8-inch frying pan
a dinner plate at least 2 inches in diameter wider than your frying pan


Directions

1) Peel the skin off of the potatoes and cut them into large cubes.

2) Cut the medium white onions into large chunks.
3) Heat a cup or so of vegetable oil in a wok. Once hot, gently drop the potatoes in. Give the potatoes a stir once in a while with the spatula, to ensure the pieces cook evenly. Drop in the onions a few minutes after the potatoes start to brown and cook until the onions are softened and translucent but not caramelized.

4) Drain the potatoes and onions onto a bowl lined with paper towels and salt to taste. Set aside. Reserve a tablespoon on the frying oil for the next step.
5) Heat your frying pan with the reserve oil. In the meantime, beat four eggs and season. Once the pan is hot, gently pour in the beaten egg mixture and watch until the sides start to soufflé.

6) Pour in the fried potatoes and onions onto the souffléd egg base and gently work the potato-onion mixture into the egg with a rubber spatula.

7) Once the mixture starts to look like it will hold together well, take a large dinner plate and flip the frittata onto the plate. Gently return the flipped frittata onto the frying pan for about a minute to fry the other side. Rita does this about three times in fairly quick succession before finally turning over the finished frittata on to a plate to serve.

Rita working the potato and onion mixture into the egg mixture. By turning the pan into its side like this, she ensures the egg mixture spreads all over the surface of the pan.

Rita working the potato and onion mixture into the egg mixture. By turning the pan into its side like this, she ensures the egg mixture spreads all over the surface of the pan.

Rita first plate-to-pan frittata flip. She does this around three times to ensure no wet yolks remain in the finished dish.

Rita first plate-to-pan frittata flip. She does this around three times to ensure no wet yolks remain in the finished dish.

The onions have caramelized in the frying pan and the egg exterior has transformed into a crispy outer shell encapsulating the potatoes and onions.

The onions have caramelized in the frying pan and the egg exterior has transformed into a crispy outer shell encapsulating the potatoes and onions.

The finished dish should not have any leftover runny-yolks from the egg running all over the plate and you should be able to transfer it onto a serving plate without difficulty.

The finished dish should not have any leftover runny-yolks from the egg running all over the plate and you should be able to transfer it onto a serving plate without difficulty.

Rita serves the finished dish with some ripe tomatoes and basil drizzled with a tiny bit of olive oil and salt. This dish can handily feed four as a light lunch, but I ate close to three-quarters of the frittata. Such is the power of dishes like these - simple in concept and construct, but no less powerful, sensory, and satisfying in nature.


Photographs and Words: Issha Marie

Les Recettes de Ma Mère: Callos a la Madrileña

This post will mark the start of a new bi-monthly series on dishes that remind us of home. Les Recettes de Ma Mère (My Mother's Recipes) will take a look at some of the dishes we have grown up with, with special emphasis on the multicultural culinary landscape Vancouver has, and how each of these cultures' dishes has defined 'comfort' and 'home'.

-

Callos a la Madrileña (cal-yos a la ma-dri-le-nya) is a tripe stew, and its origins stem from Madrid. The Filipinos have adopted this dish, among many other Spanish dishes, largely because the country was colonized by the Spanish in the mid-1500's, and remained under the Spanish rule until the late 1800's. Spain has left more than just cultural traces in the Philippine culinary landscape, and while, admittedly, Filipino cuisine is difficult to describe, much of the country's cuisine is European by nature.

My mother takes an entire day (or two) to prep for this stew. I remember the smell of tripe tenderizing; that is usually what she tackles first, and it is not a very pleasant smell. The sauté of aromatics that come after the meaty-fatty mise-en-place - that sweet-char smell that emanates from the bell peppers, the onions, and the garlic hitting the hot oil - are what I look forward to smelling the most when she prepares this family favourite. When the dish is finally ready to eat, I serve myself a generous portion, but I usually pick off the tripe from my dish. I was never a fan of the texture, but the use of tripe really lends itself to the richness and the resulting tomato-smoke-umami of the stew.

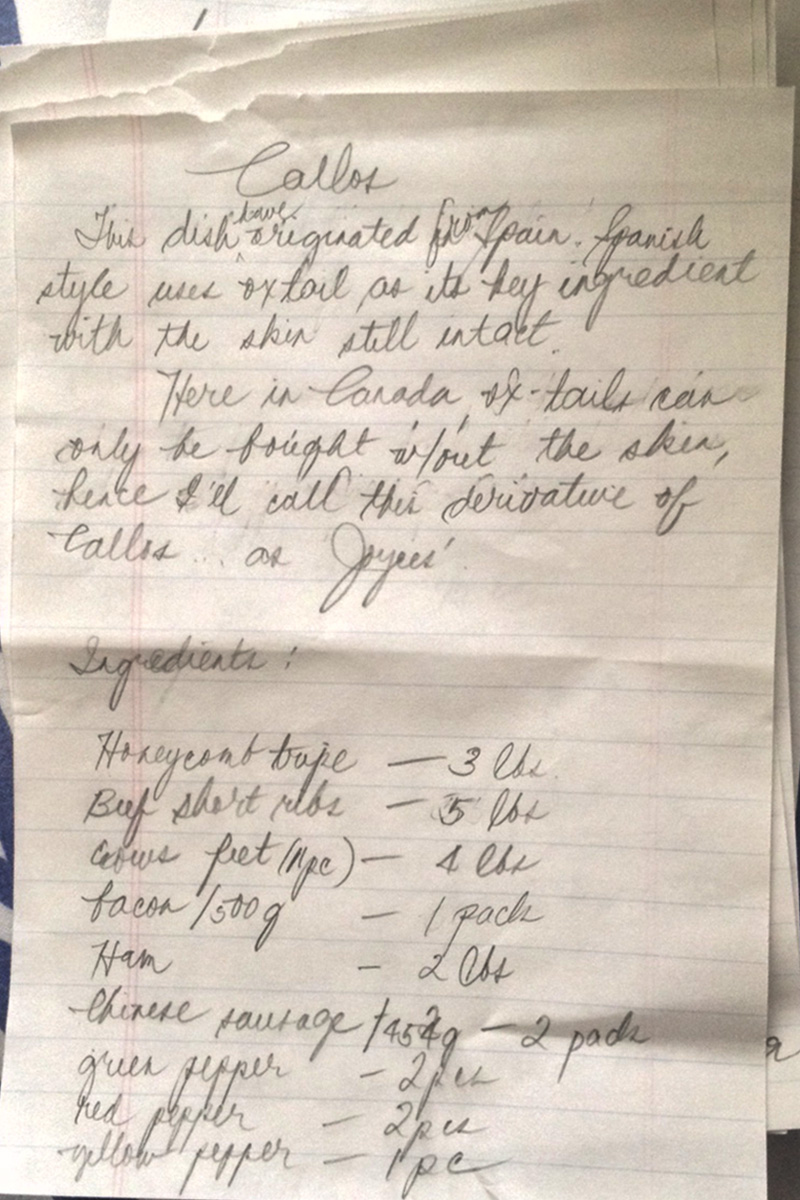
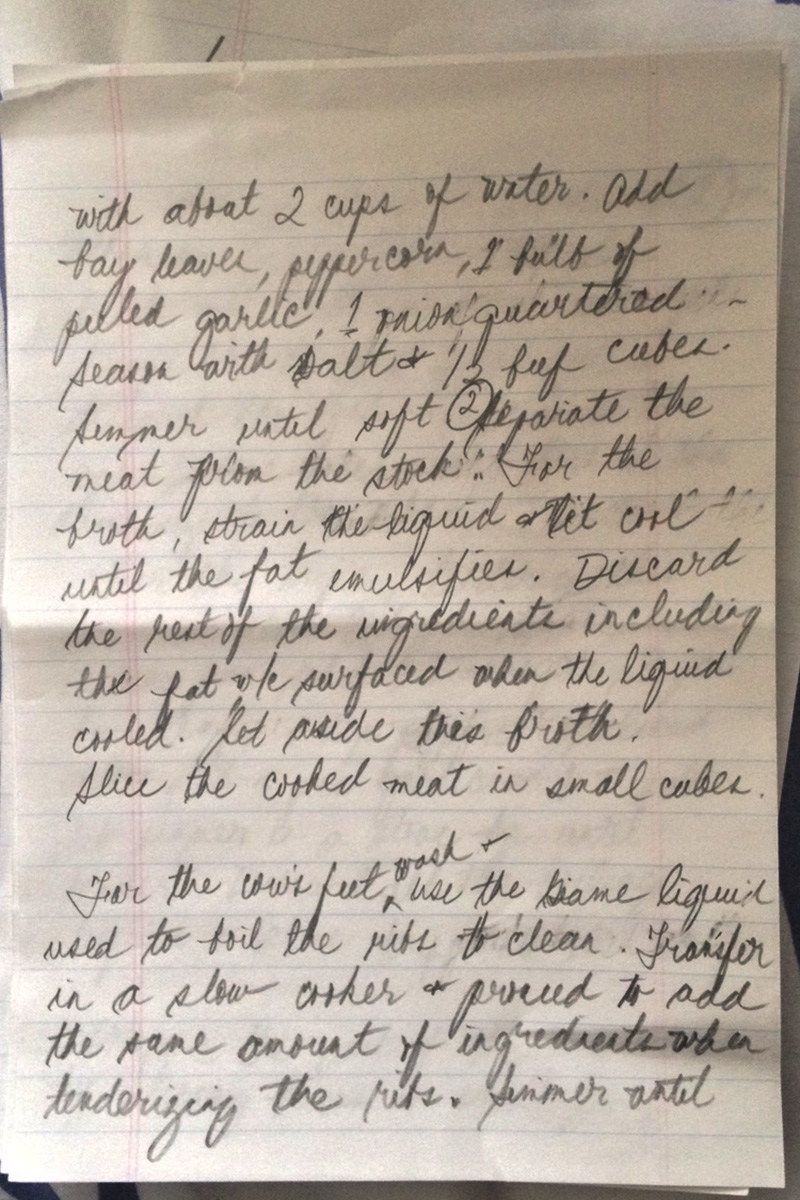
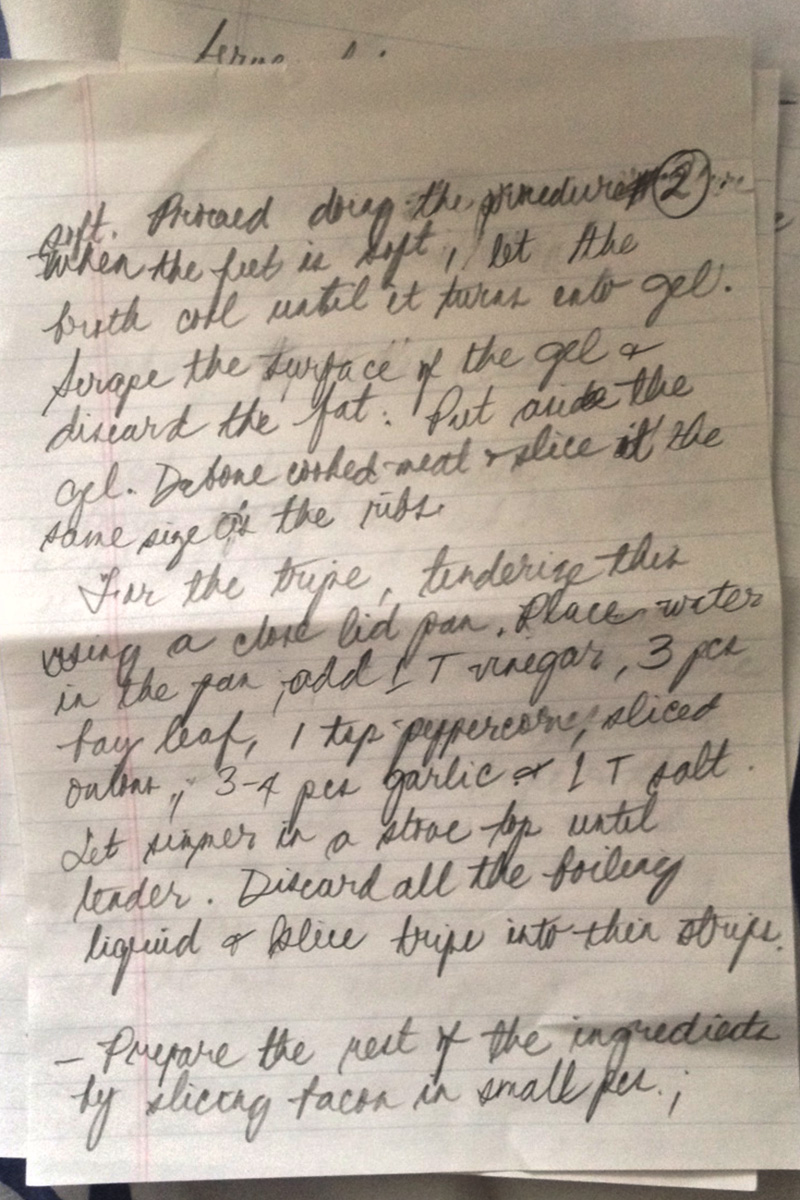
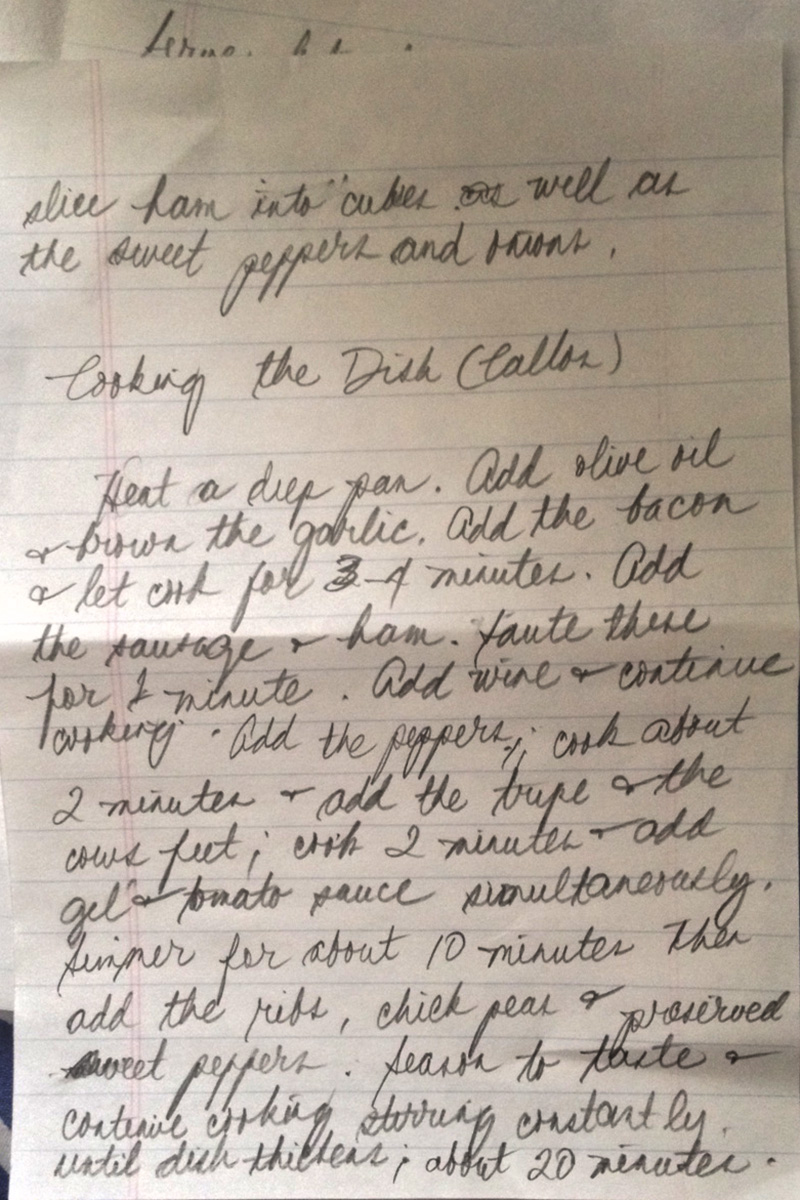
This version is a tripe-less version, and is much easier to prepare for the curious home cook who wants to try something different, but has not the wherewithal to acquire premium ox tripe and ox legs, nor the time and patience it takes to go look for a great butcher who will source a decent product for you. That is me, in a nutshell. I work more than 40 hours a week, I have allowed myself a small food budget, and I hardly ever have time to cook for my self these days, much less take two whole days to prepare this classic Spanish-Filipino stew. So when I was presented with this assignment, I racked my brain for two whole days trying to figure out how to replicate the classic flavours of callos without having to deal with the smell of tripe and the costs it takes to make the stew. I pored over my mom's messy handwriting for her callos recipe, dug deep into my memory banks for the flavours that stood out for me, and, by golly... I think I've done it! I know I've done it - because the proof, as they say, is in the pudding (or stew, in this case). Sorry, mom! My version is just as good, I swear!

Callos a la Madrileña (Filipino-style)
Preparation time: 4 hours | Serves 8-10

Ingredients
1 can chickpeas
2 cans peeled, whole tomatoes
4 sweet bell peppers (2 red, 1 green, 1 yellow), cut into large chunks
2 medium Spanish onions, cut into large chunks
4 cloves of garlic, finely minced
1 tbsp. Mexican oregano
1 tsp. dried thyme

500 grams beef stew meat
300 grams applewood-smoked bacon, diced
2 to 4 cured chorizo de Bilbao (or any cured sweet Spanish or Portuguese-style chorizo), sliced into coins

1 organic beef bouillon cube
3 cups water
3 bay leaves
4 to 5 pieces dried chile de arbol
2 chili peppers in adobo sauce, finely chopped with about 2 tbsp. reserved adobo sauce
2 tbsp. sweet smoked paprika
1 tbsp. brown sugar

2 tbsp. olive oil

Mise-en-place
1) Chop the vegetables and set aside.
2) Drain the liquid off of the can of chickpeas and set aside. 
3) Set the dried aromatics, spices, and seasoning aside: dried thyme, Mexican oregano, bay leaves, chile de arbol, organic bouillon cube.
4) Dice bacon and slice the cured sausage.

Directions
1) Preheat your oven to 350C.
2) In a Dutch oven or deep skillet, heat olive oil. Gently fry the bacon until nice and crisp. Drain with a slotted spoon and set aside.
3) Fry the sliced chorizo in the bacon fat until the edges are slightly crisp. Drain with a slotted spoon and set aside.
4) Brown the beef stew meat until outer exterior is nicely caramelized. Set aside.
5) Pour away any excess bacon fat, but leave some for the vegetables to sauté in. Sauté the peppers and onions in the pork fat until slightly softened. Add the garlic, Mexican oregano, and dried thyme and continue to sauté until garlic has sufficiently browned and has imparted its garlicky aroma. Take the vegetables out and set them aside for later.
6) In the same dutch oven, add the browned beef and the chorizo and cover with three cups of water and the two cans of peeled, whole tomatoes. Crush the tomatoes with your wooden spoon. Add the beef bouillon cube, the chile de arbol, and the bay leaves and make sure to scrape any excess brown bits off of the bottom of the pan. Add the brown sugar, paprika, and the adobo peppers and let it dissolve into the liquid. Put to a gentle simmer before turning off the heat and place inside your preheated oven. 
4) Leave the stew inside the oven for two hours. After two hours, add the chickpeas, and leave the stew inside the oven for another 45 minutes to an hour. The chickpeas will thicken the sauce naturally without the addition of the tripe.
5) After the last hour, fish out the bay leaves, and stir in the reserved sautéed vegetables and crispy bacon. Test the stew for seasoning. I found that over the course of the three hours, the chorizo has imparted most of its seasoning into the stew, so the callos did not need any salt. Serve the stew over cous cous with lemon zest and chives, or traditionally, over steamed jasmine rice.

Recipe courtesy of Joyce Onoya
Words and Photographs by Issha Marie